Each clarinet is a little piece of history. While the clarinet is rooted in ancient single reed "shepherd's instruments" played by the Greeks, the modern clarinet took shape in Europe sometime in the 18th century. Like a larger, more complex version of the recorder, the clarinet is a woodwind instrument with a clear, mellow tone common to classical music and jazz. If you're joining the ranks of the clarinet player, learning to assemble and maintain your instrument is the first order of the day. See Step 1 to learn how to assemble the barrel, organize the mouthpiece, and keep your horn in good working order.
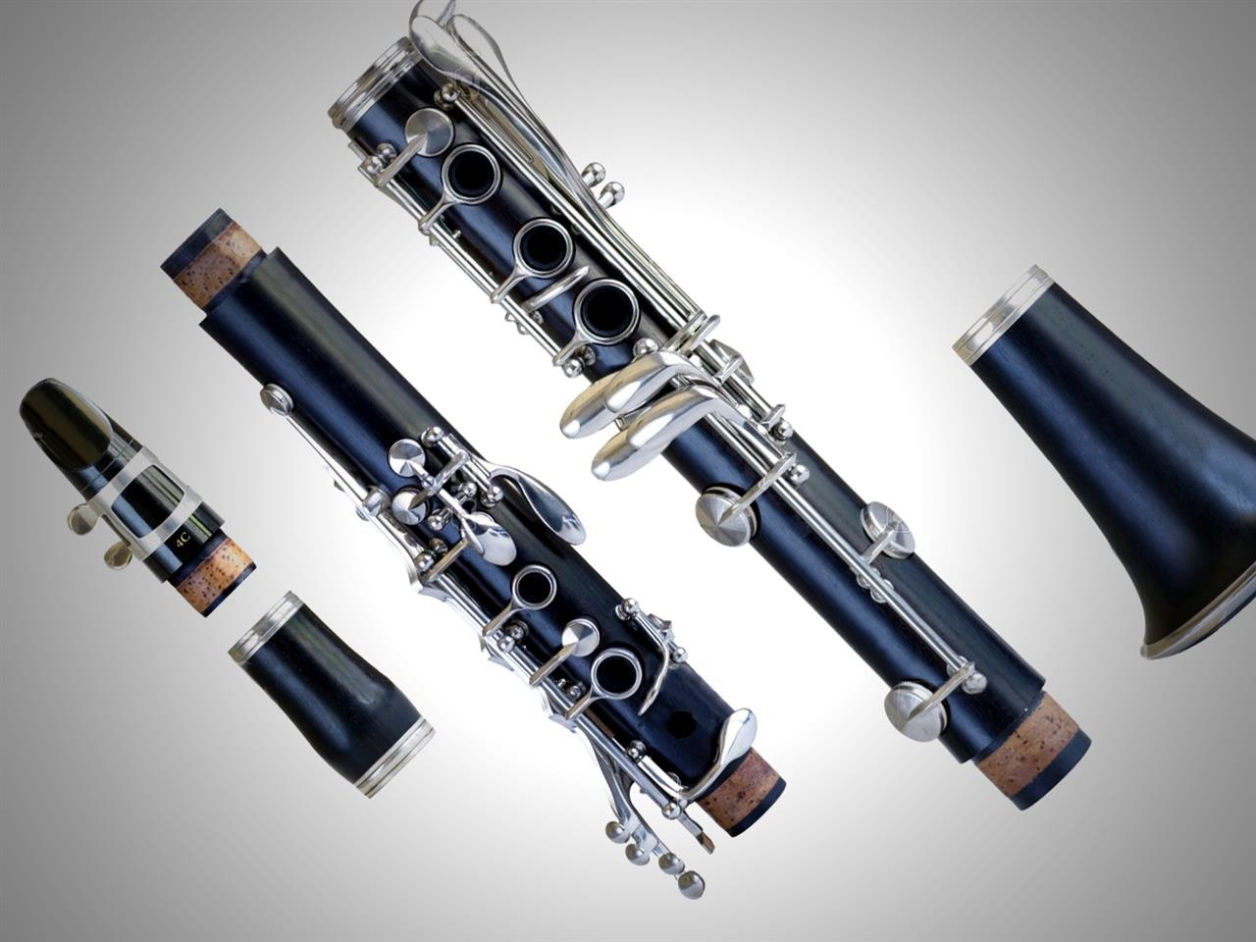
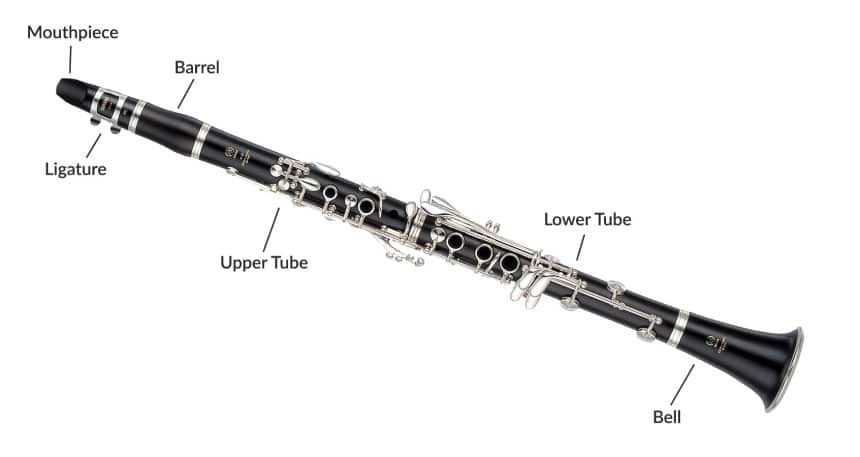
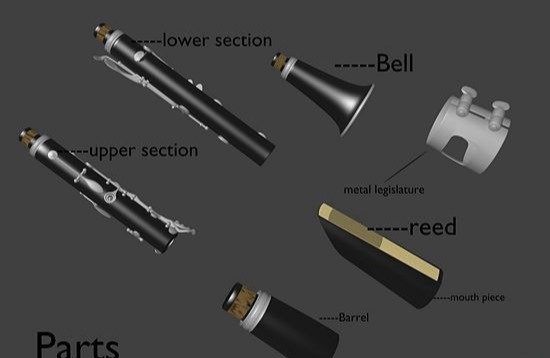
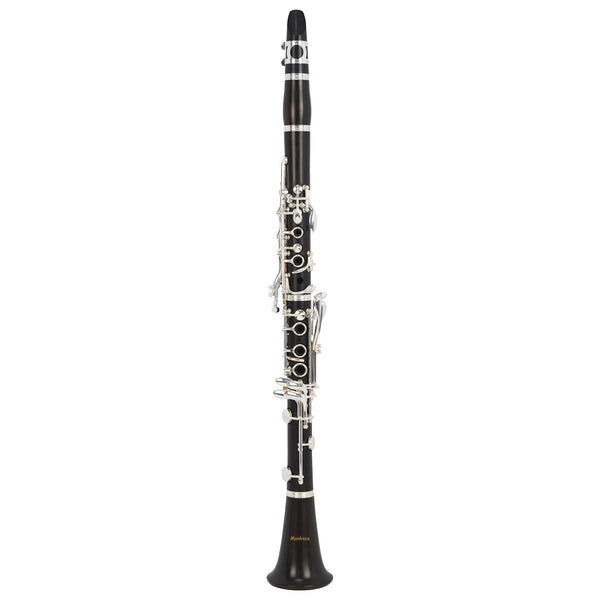
Identify and inspect the individual pieces of the clarinet. Open the clarinet case and make certain all of the components of the clarinet are in good working condition, clean and ready for use. A basic clarinet will consist of four major pieces that connect by cork-lined joints, as well as a mouthpiece, which is made up of several smaller components.[1]
The bell refers to the very bottom, cone or bell-shaped part of the clarinet.
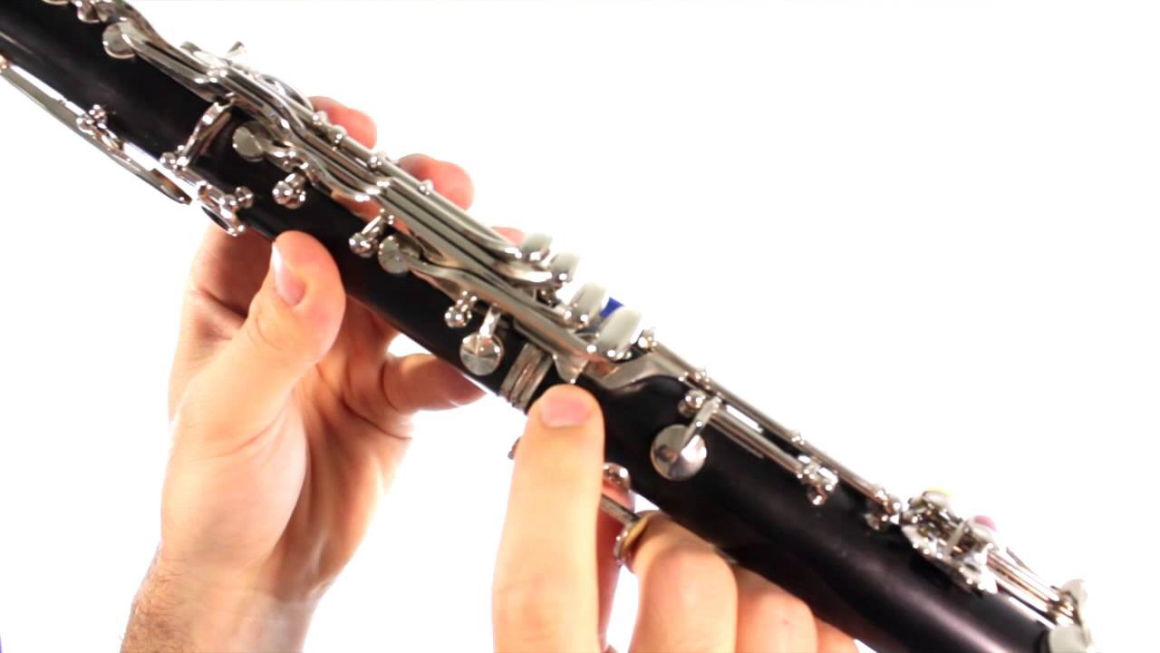
The lower joint stalk is the biggest piece of the clarinet. It should have metal keys on the right side of the instrument when oriented correctly, with a bridge key pointing up toward the upper joint. The best way to distinguish between the lower and upper joints is that the upper stalk will have two cork connections, called tendons, while the lower will have one lower cork joint and a metal ring around the upper joint, which marks the center-point of the instrument.
The upper joint stalk will have keys on the left-hand side of the instrument and should be slightly shorter than the bottom joint. Oriented correctly, there should be a bridge key hanging over the connection point at the bottom, and some space between where the keys end and the top of the upper joint, where it connects to the mouthpiece. In other words, you'll know you have the pieces lined up correctly because there should be no keys at the very top or very bottom of either piece.
The barrel is a short section of the instrument that basically connects the top joint to the mouthpiece. There are no keys on the barrel, and the barrel will often be stamped with the brand name of the instrument.
The mouthpiece consists of the black mouthpiece housing, as well as a metal ligature, which is used to hold the reed in place on the mouthpiece. Many clarinets also come with a metallic mouthpiece cover, used to protect the mouthpiece in the case.
First, you'll want to attach the bell to the lower joint. Holding the lower section, gently but firmly push and twist the bell back and forth while you hold the lower joint securely in your other hand.
Generally, clarinet players will assemble the clarinet by starting with the bell, then attaching the lower joint, the upper joint, the barrel, and the mouthpiece, in that order, although there's no wrong way to put it together. The clarinet won't sound better or worse if you start by assembling the barrel and the upper joint, then start on the bottom and jump around.
However you assemble the clarinet, you'll probably want to assemble the mouthpiece last, because the reed needs some time to moisten before you play it. For this reason, it makes the most sense to start with the bottom.
This will make your clarinet easier to put together and take apart. Most of the time, cork grease comes in a tube that looks like lip balm. If you don't have any cork grease with your clarinet, petroleum jelly can be used as a substitute, though using actual cork grease is recommended.
Hold each piece parallel to the ground, with the large bridge keys facing toward you, and line them up. Make sure the bridge keys, two little metal pieces under the long keys on the side of the upper joint, are perfectly aligned, then use a gentle pushing and twisting motion to attach the two sections, aligning the bridge keys, and lowering the upper tab over the lower to fit them together securely.
Grip the lower joint with your right hand on top of the piece, just below the cluster of keys in the center of the piece, and over the two large keys toward the bottom. These keys are relatively flat and can be pushed down safely while you grip the instrument without risking bending anything.
Grip the upper joint with your left hand underneath the piece by wrapping your fingers under the instrument and around the large ring key, which should raise the bridge key when you depress it. This will be necessary to get the two pieces fit together properly. Carefully line up the bridge keys and fit the instrument together.
To make sure you've aligned the instrument properly, look at the metal bar that runs the length of each section of the instrument, supporting the keys. Both segments of that rod should be perfectly lined-up. This means the bridge keys will be lined up as well.
Now comes the easiest part! Attach the barrel onto the top of the horn. The bottom end, which attaches to the upper joint, should be slightly larger than the top end, which attaches to the mouthpiece. Push this small piece down onto the upper joint, twisting gently, and make sure it goes all the way down and fits snugly.
The barrel is pulled out or pushed in to tune the clarinet, by making the instrument slightly longer or slightly shorter, depending. When you're first starting out, though, push the barrel all the way down until you've got some sense of your horn and the way it needs to be tuned.
It's common to prepare the mouthpiece and attach it to the barrel, then screw on that assembly to the top joint of the clarinet before attaching the barrel, as well. One way is not more wrong or more right. It usually just depends on the size of the hands of the clarinet player: some players find working with the tiny mouthpiece too small and prefer having the barrel to hold onto while attaching the reed.
Created with Mobirise
Website Designer Software